 ( 112 ) 12-Mar-2015
Now on to making the braces.
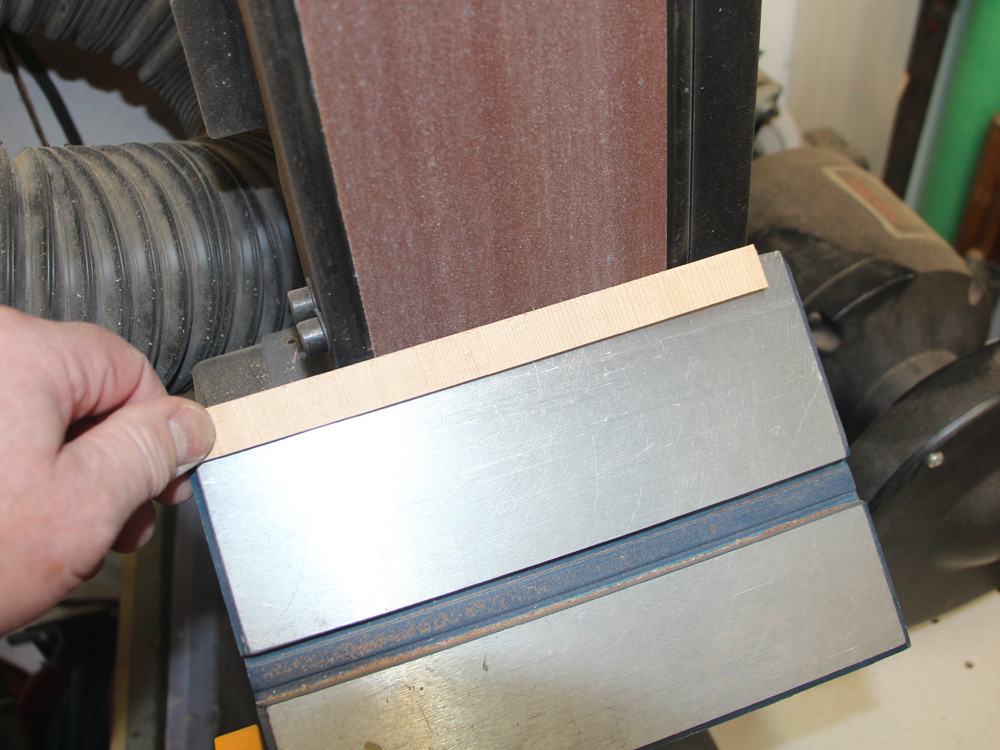
I have set up my brace sanding fixture in this picture. I tilt it so I use all of the sanding belt rather than a thin band.
OM..................... 15" Lower Bout
Body..................... Walnut
Top....................... Sitka Spruce
Bracing................. Engineered asymmetrical modified X-bracing system
Neck..................... 25.4" Scale Maple,
User Adjustable Tilt Action Neck … Variable String to Fretboard Spacing
Dual action truss rod
Fretboard.............. Ebony
Bridge................... Ebony
Binding................. Blooodwood
Appointments....... Shell Inlay
Tuners.................. Gotoh 510 Silver
Nut & Saddle....... Bone
( 112 ) 12-Mar-2015
Now on to making the braces.
I have set up my brace sanding fixture in this picture. I tilt it so I use all of the sanding belt rather than a thin band.
 ( 113 ) 12-Mar-2015
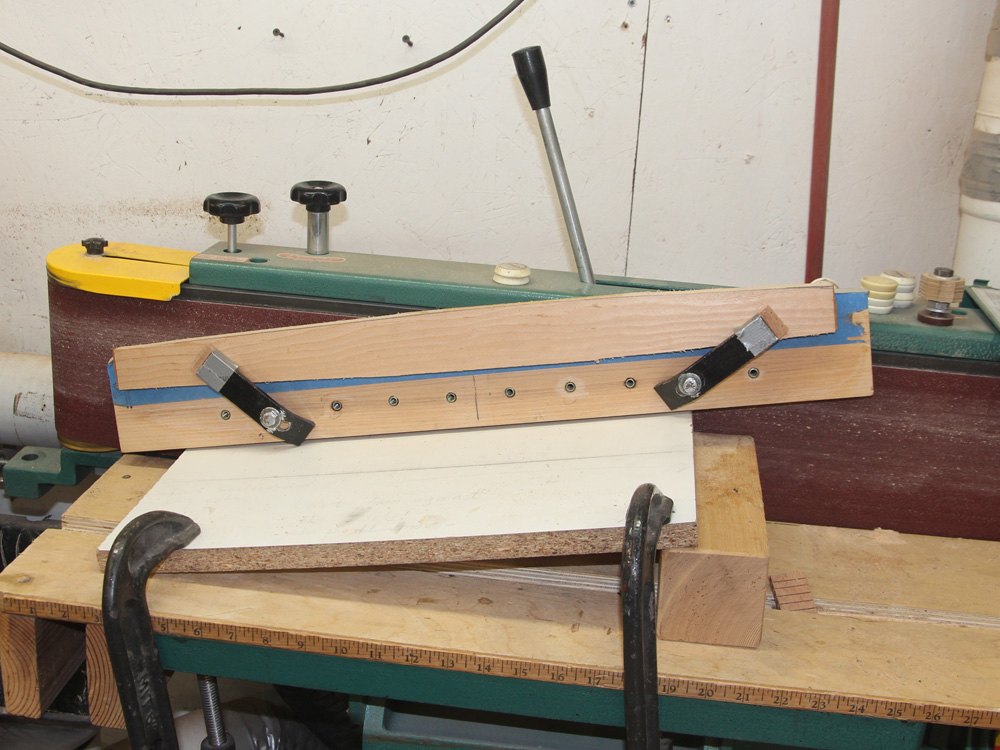
The backs of my guitars have a bowl shape and the tops have a unique modified bowl shape... the secret sauce if you will. To make the the braces I first created a template that matches the bowl shaped sanding plate. The sanding plates have the shape I want the top and back to take on. I attach the brace blank to the template.
 ( 114 ) 12-Mar-2015
You can see here that the brace blank, attached to the back of the template in this picture, overhangs the template by a bit.
 ( 115 ) 12-Mar-2015
When the template pushes up against the aluminum edge band on the white platen, it can go no further toward the sanding belt. The overhanging brace blank then takes on the shape of the template as I sand along the length of the blank. I have different templates for the various braces.
 ( 116 ) 12-Mar-2015
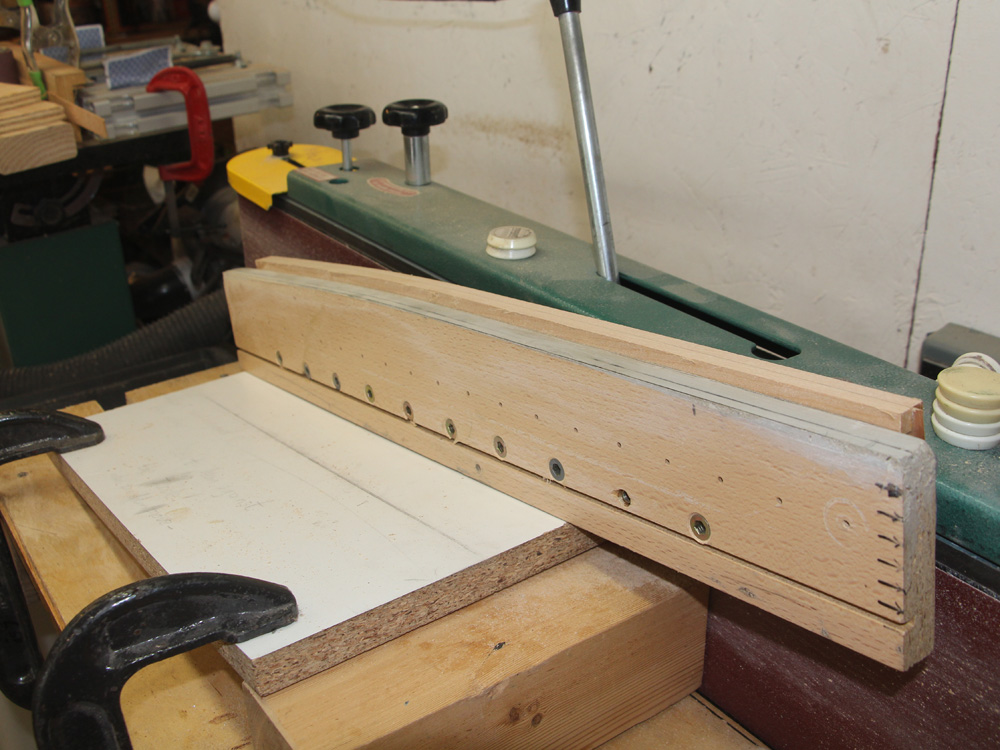
This blank contains both legs of the x-brace. I use the sanding plate to fine tune the shape of the blank.
 ( 117 ) 12-Mar-2015
Next I drill holes in the brace blanks to remove unnecessary mass.
 ( 118 ) 12-Mar-2015
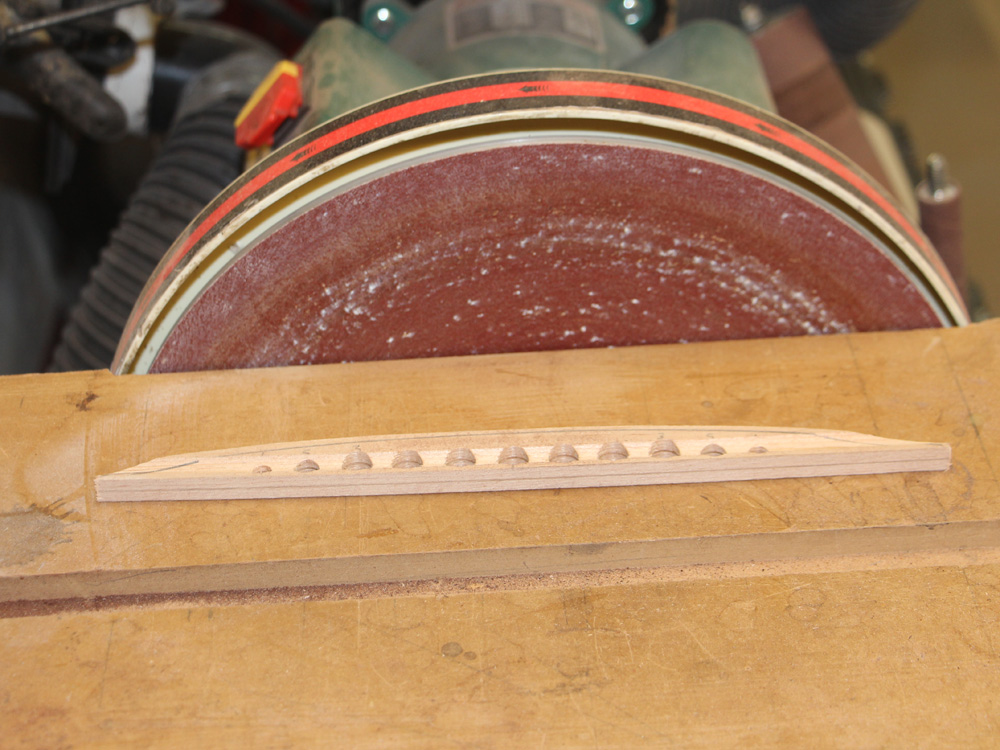
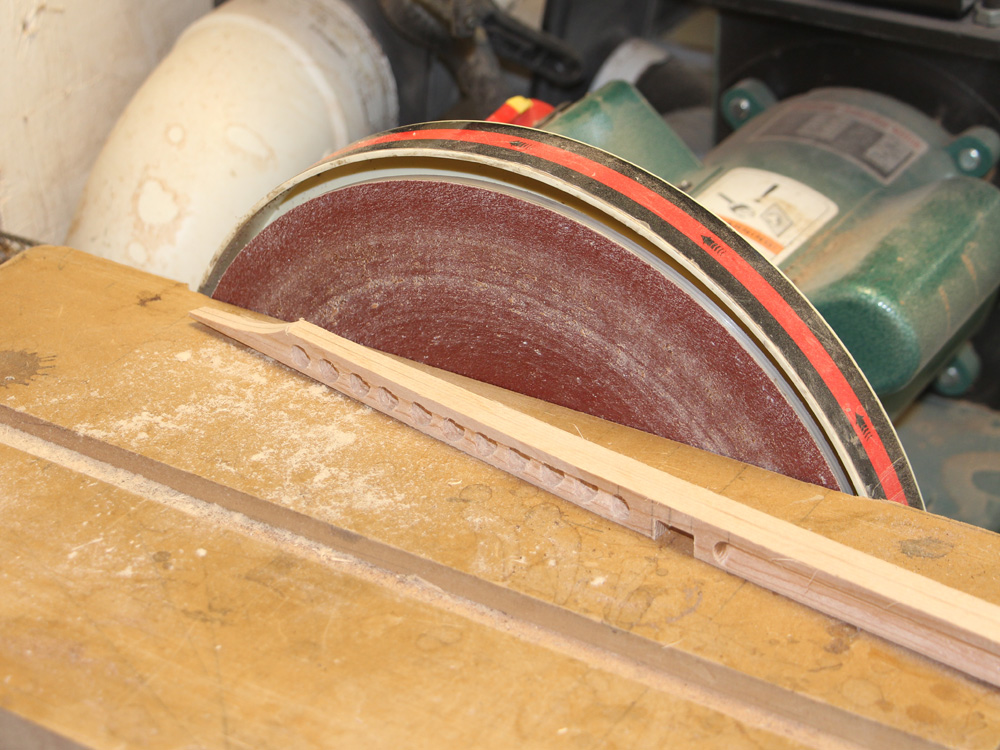
And then I use my router table to create channels in the sides to further reduce the mass of the braces. Mass bad, stiffness good.
 ( 119 ) 12-Mar-2015
 ( 120 ) 12-Mar-2015
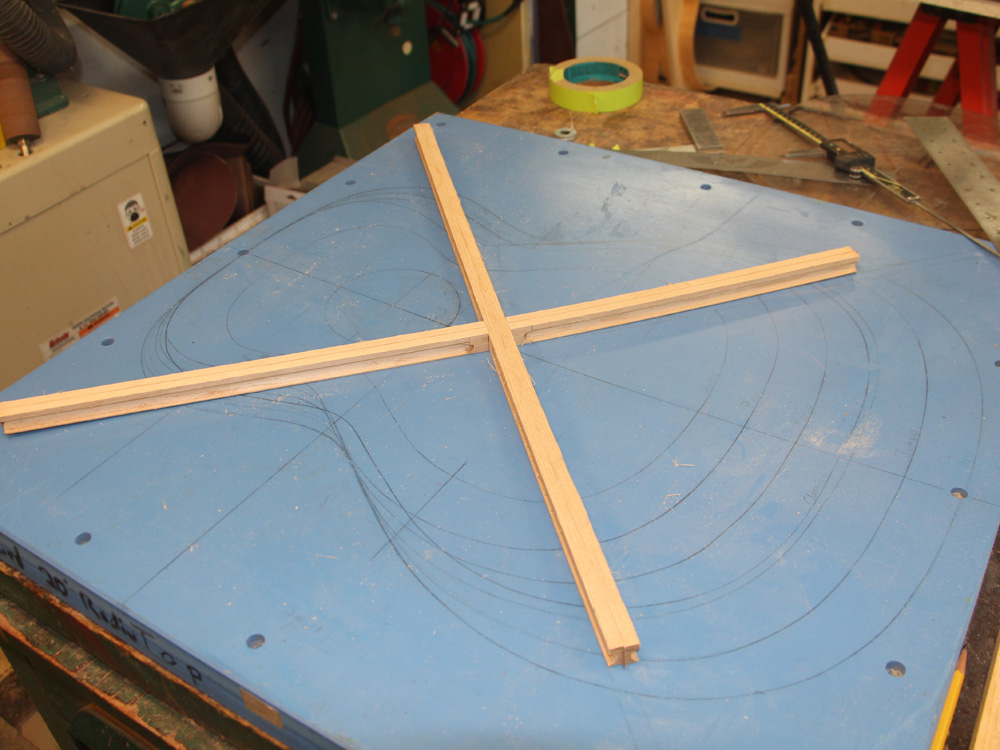
Now, with the blanks ready I layout the brace pattern on the back plate.
 ( 121 ) 12-Mar-2015
After marking the precise length of the braces on the blanks, I sand the braces to size and shape.
 ( 122 ) 12-Mar-2015
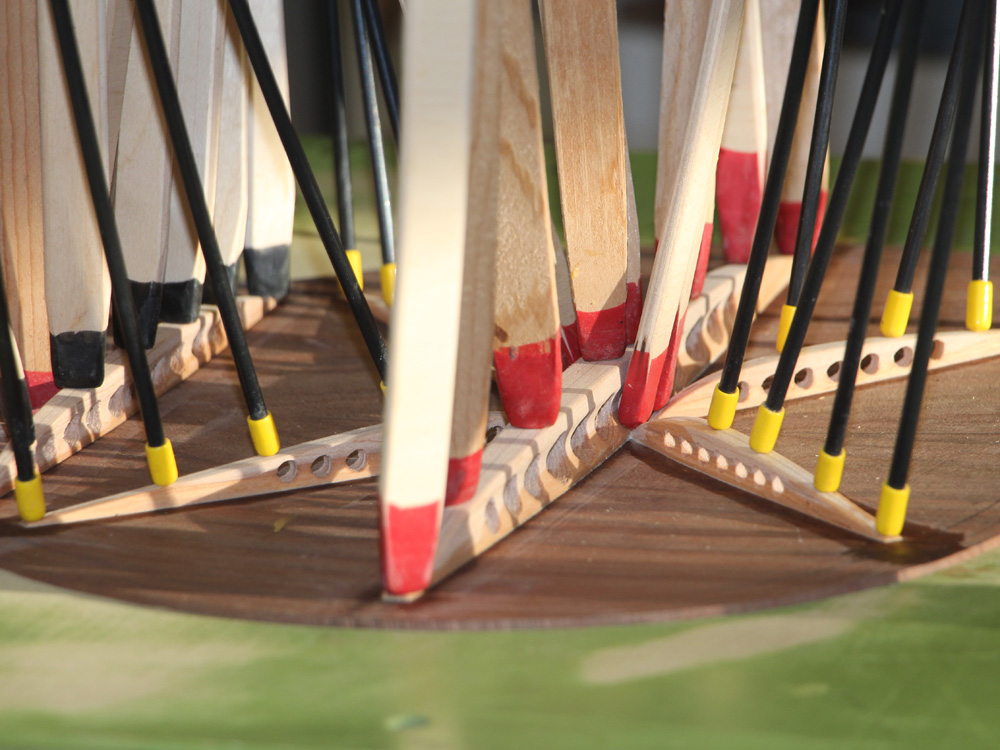
Laying them out to make sure they fit... actually I just like to see the pattern and admire my work. I call this fondling the wood.
 ( 123 ) 12-Mar-2015
A bit of hand sanding to smooth everything out.
 ( 124 ) 12-Mar-2015
Next I check the outline of the rim on the back plate.
 ( 125 ) 12-Mar-2015
And when I am confident everything is ready I cut the back plate out. I leave a bit of extra wood around the edge just to give myself a little tolerance.
 ( 126 ) 12-Mar-2015
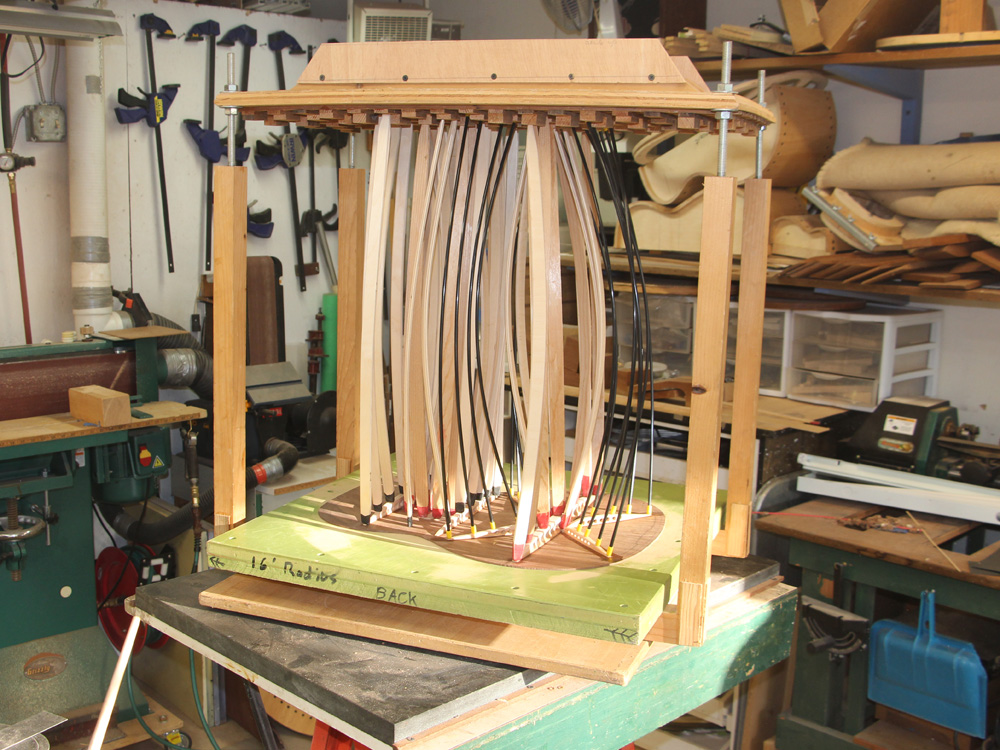
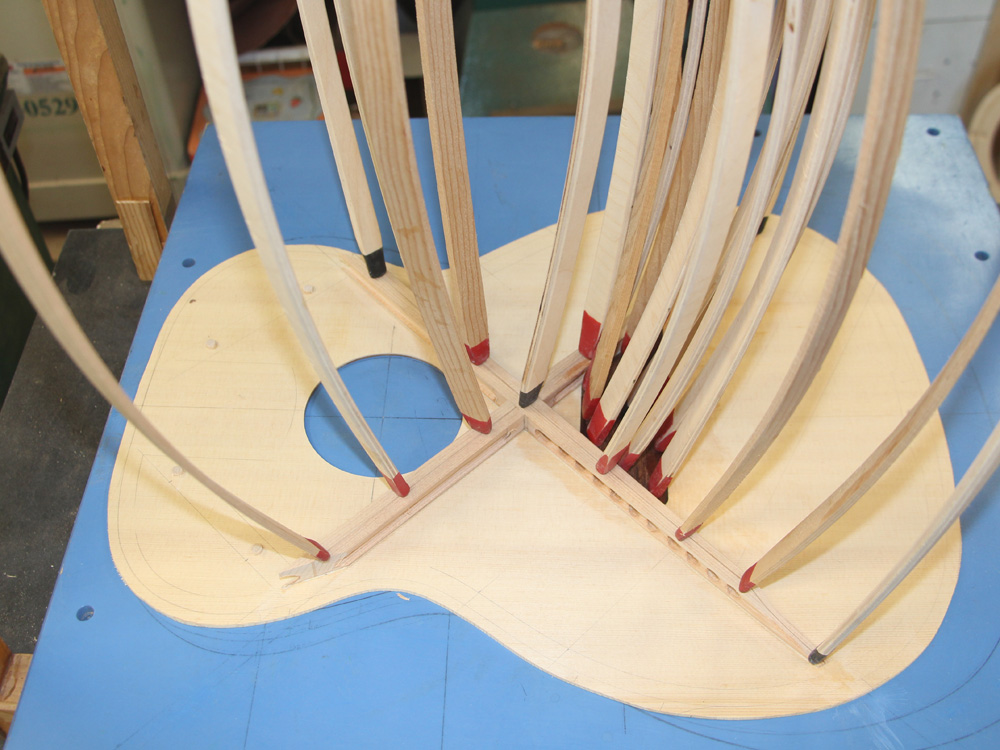
And into the go-box. I use bendable go-sticks to apply force to the part and help make a good joint.
 ( 127 ) 12-Mar-2015
More sticks...
 ( 128 ) 12-Mar-2015
I clean up the glue squeeze out before it sets.
 ( 129 ) 12-Mar-2015
 ( 130 ) 12-Mar-2015
 ( 131 ) 12-Mar-2015
This is the result of the first pass in the go-box.
 ( 132 ) 12-Mar-2015
Here I am putting a bevel on the seam reenforcing strip.
 ( 133 ) 12-Mar-2015
And then I install the rest of the parts.
 ( 134 ) 12-Mar-2015
Now I cut out the X-braces from the worked brace blank.
 ( 135 ) 12-Mar-2015
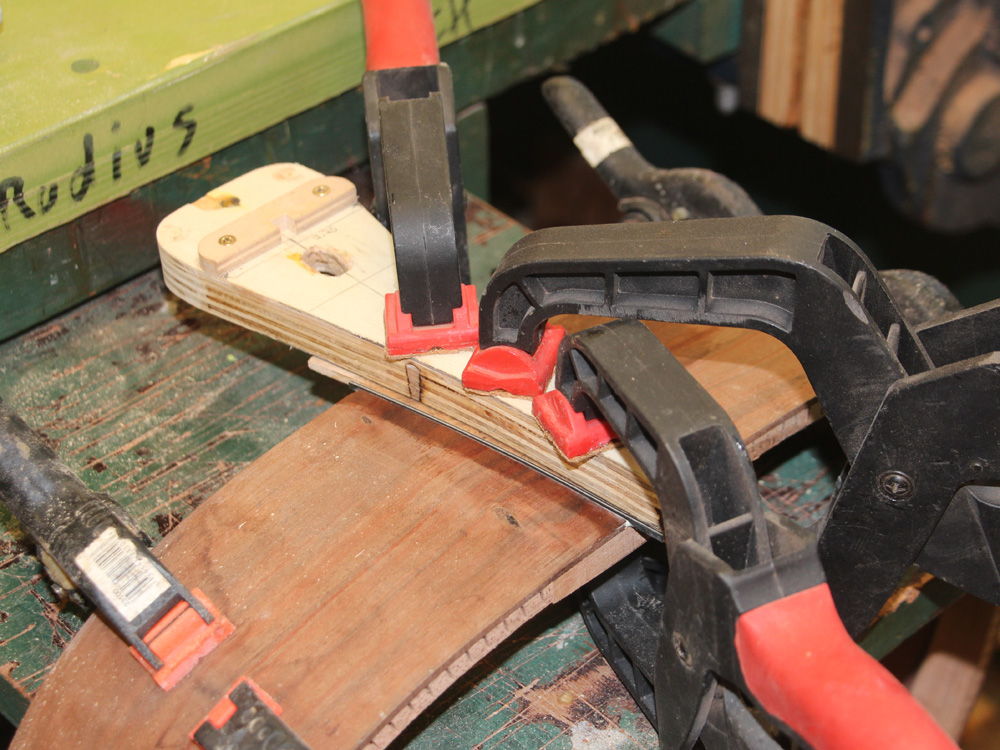
I use this setup to sand the two legs to the same height.
 ( 136 ) 12-Mar-2015
And then I use the band saw an a tilted platen to cut the scarf joint into the two legs.
 ( 137 ) 12-Mar-2015
They fit together with a tight fit and at the correct angle, 93 degs in this case.
 ( 138 ) 12-Mar-2015
And I trim them up to shape.
 ( 139 ) 12-Mar-2015
The treble side of the x-brace is taller and stiffer than the tapered bass side of the brace. This is intended to spread out the resonance of the top.
 ( 140 ) 12-Mar-2015
The finger braces get shaped.
 ( 141 ) 12-Mar-2015
And made into I-beams to reduce mass.
 ( 142 ) 12-Mar-2015
The assembly scheme I use depends on placing the braces accurately so I use fiducial buttons to guide their placement. I have drilled a hole in the bottom of the brace, put a small dowel in the hole and then put a drop of glue on the end.
 ( 143 ) 12-Mar-2015
When I place the brace on the back of the top in the right place and let the glue dry, the button sticks to the top. So, now I can return the brace to its proper position.
 ( 144 ) 12-Mar-2015
A bit of sanding to get rid of the spruce fuzz.
 ( 145 ) 12-Mar-2015
Laying it out.
 ( 146 ) 12-Mar-2015
I make the bridge plate out of Indian Rosewood.
 ( 147 ) 12-Mar-2015
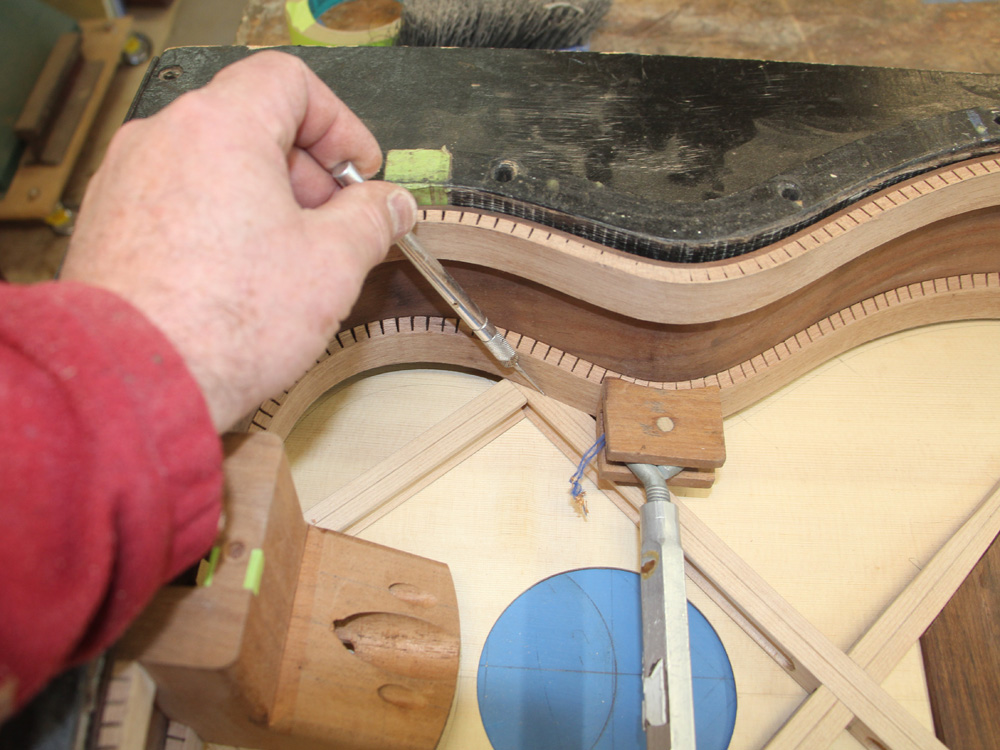
Now, With the x-braces in place I lay the rim on top of the braces and mark where they intersect.
 ( 148 ) 12-Mar-2015
I trim the ends of the braces and then the rim will slide right into place. This fit is important as I can't see any of this when I glue the top to the rim.
 ( 149 ) 12-Mar-2015
 ( 150 ) 12-Mar-2015
Now I cut the top plate out.
 ( 151 ) 12-Mar-2015
And fashion the sound hole rim from the excess spruce.
 ( 152 ) 12-Mar-2015
 ( 153 ) 12-Mar-2015
I glue the braces and other parts into place with the go box.
 ( 154 ) 12-Mar-2015
 ( 155 ) 12-Mar-2015
 ( 156 ) 12-Mar-2015
 ( 157 ) 12-Mar-2015
 ( 158 ) 12-Mar-2015
 ( 159 ) 12-Mar-2015
 ( 160 ) 12-Mar-2015
After the glue has set I clean everything up with a bit of hand sanding.
 ( 161 ) 12-Mar-2015
The sound hole ring gets trimmed...
 ( 162 ) 12-Mar-2015
... and shaped.
 ( 163 ) 12-Mar-2015
The rim get a set of vertical braces. These have no acoustic function, but rather are there to help prevent the sides from cracking.
 ( 164 ) 12-Mar-2015
 ( 165 ) 12-Mar-2015
I have fashioned the tail graft insert out of a piece of burled maple to match the rosette.
 ( 166 ) 12-Mar-2015
Pressed and glued into place.
 ( 167 ) 12-Mar-2015
This will get sanded flush.
 ( 168 ) 12-Mar-2015
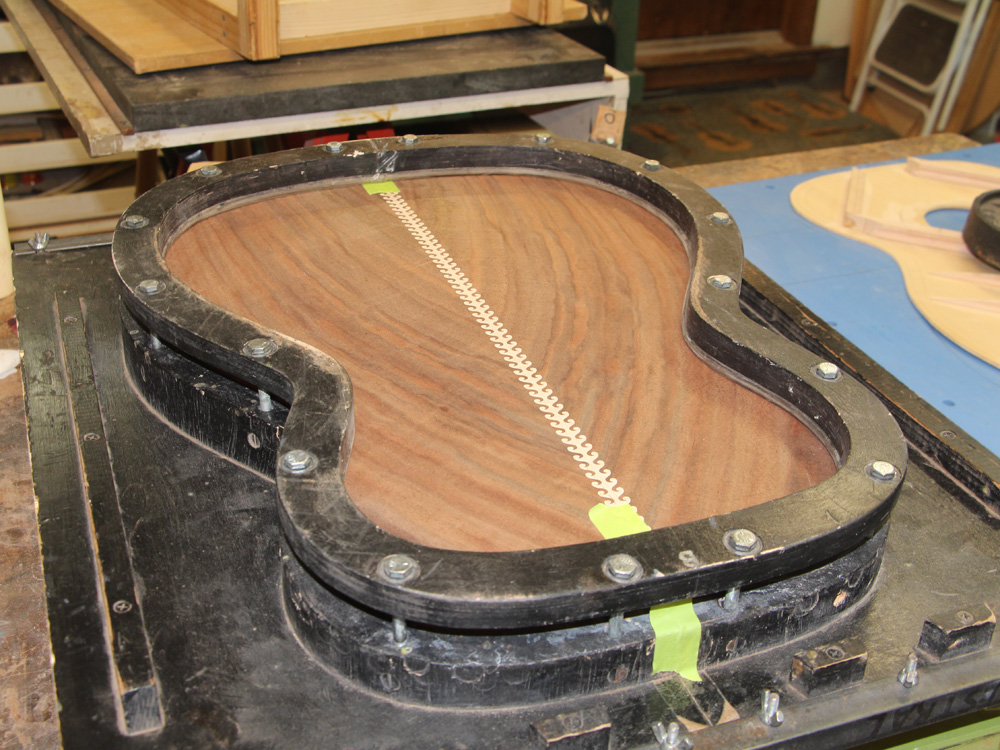
To glue the back to the rim I start by applying a layer of glue to the edge of the rim. One of the reasons we use kerfing is to give enough surface area to make a good joint.
 ( 169 ) 12-Mar-2015
I place the flange and bolt it down. This technique applies even pressure around the rim.
 ( 170 ) 12-Mar-2015
When it comes out of the form the back over hangs the rim.
 ( 171 ) 12-Mar-2015
I trim off the excess.
 ( 172 ) 12-Mar-2015
 ( 173 ) 12-Mar-2015
 ( 174 ) 12-Mar-2015
 ( 175 ) 12-Mar-2015
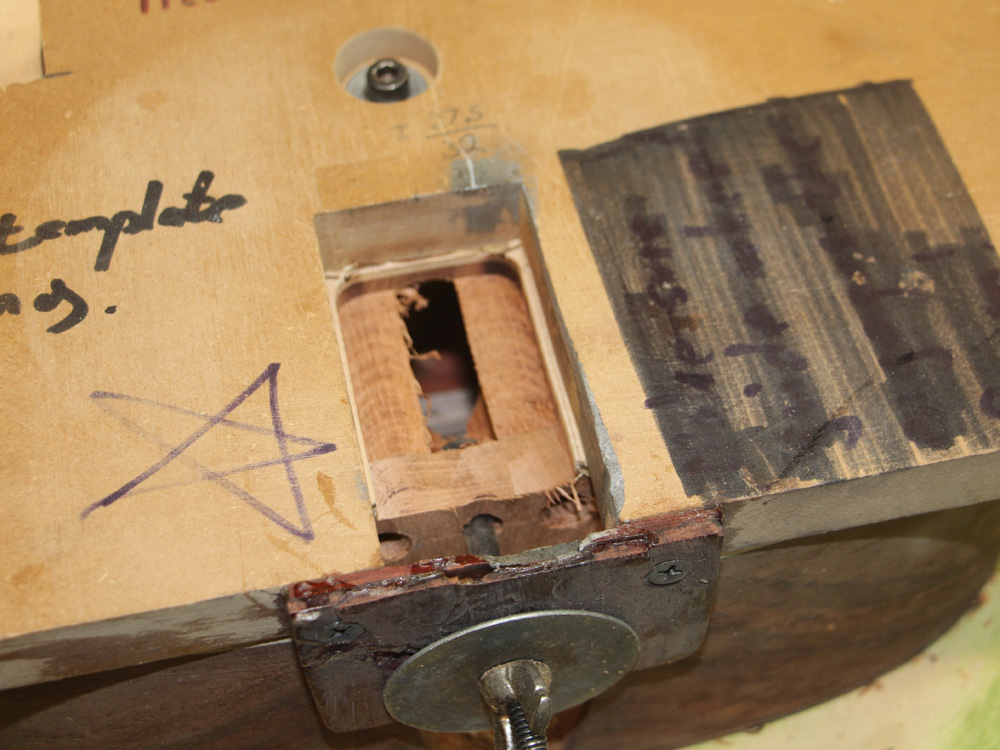
Before I glue the top on, I install the hardware for the neck attachment.
 ( 176 ) 12-Mar-2015
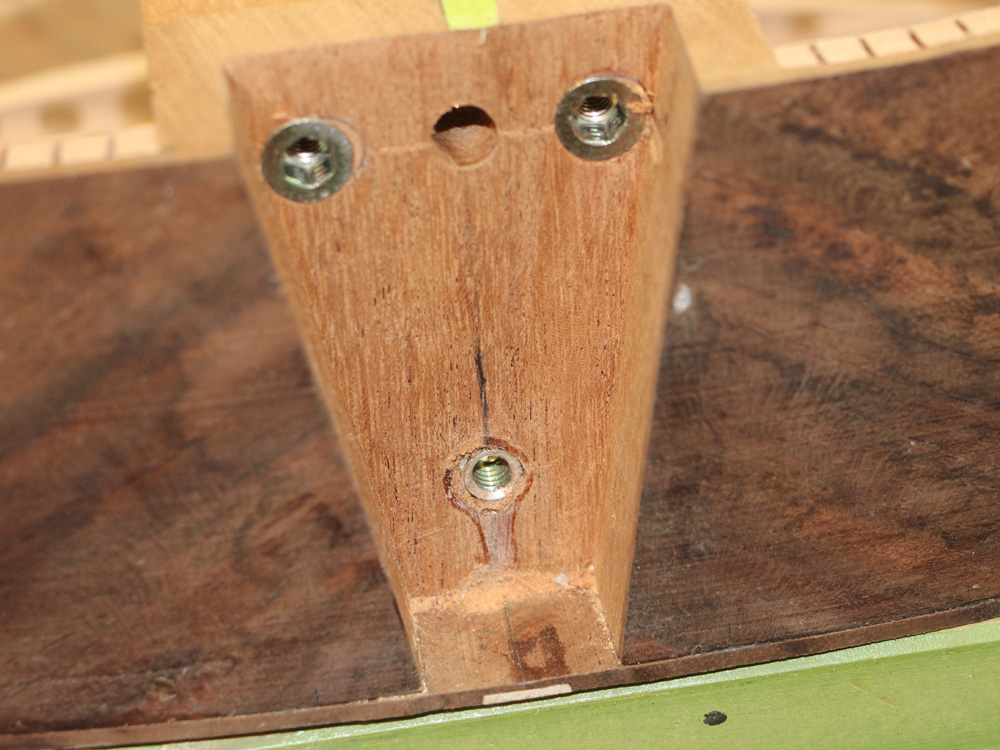
The two top inserts will hold set screws that act as the fulcrum for the tilting neck and allow me to adjust the yaw of the neck so I can get the strings to follow center line of the neck. The bottom insert will accept the neck angle adjustment bolt. And the top center is the hole for the bolt that holds the neck to the body.
 ( 177 ) 12-Mar-2015
The label, out of the way so you don't have to look at it if you don't want to. The center hole is for the attachment bolt and the small side holes are for set screw access.
 ( 178 ) 12-Mar-2015
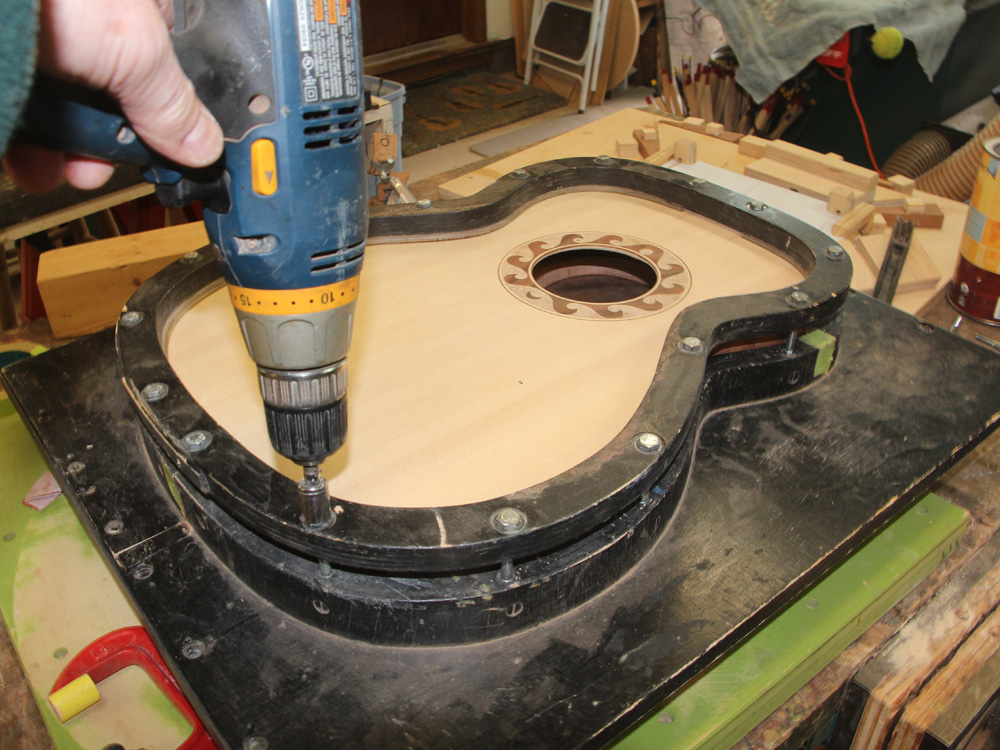
The top gets glued on to the rim.
 ( 179 ) 12-Mar-2015
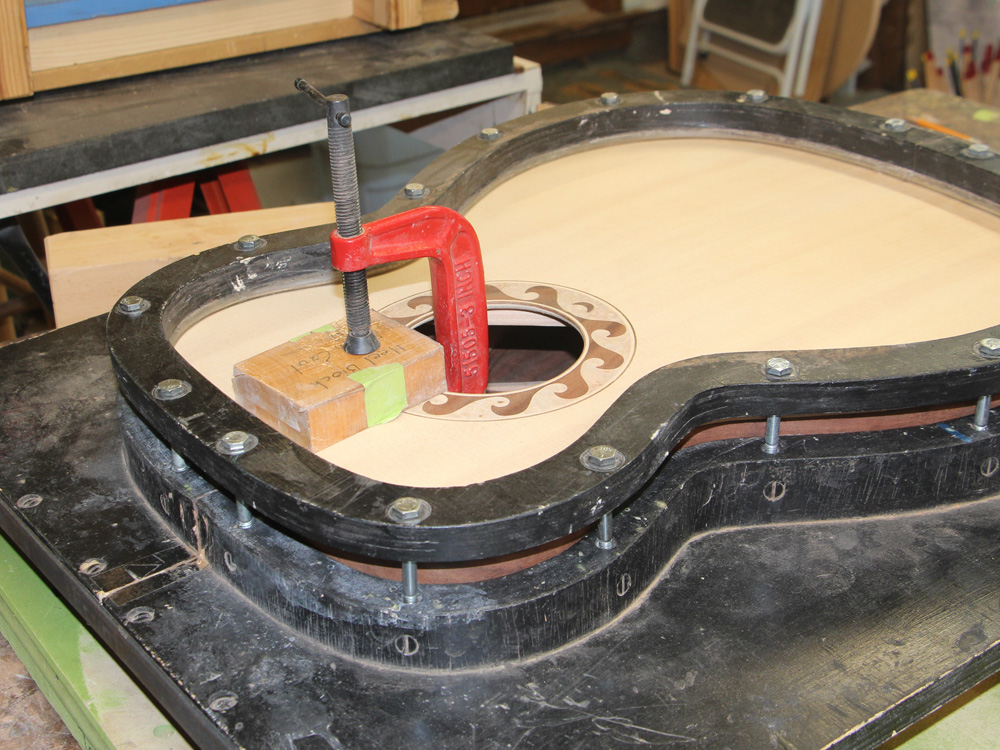
And a clamp to make sure the top makes a good joint with the heel block.
 ( 180 ) 12-Mar-2015
After it comes out of the form the excess overhang top material gets trimmed off.
 ( 181 ) 12-Mar-2015
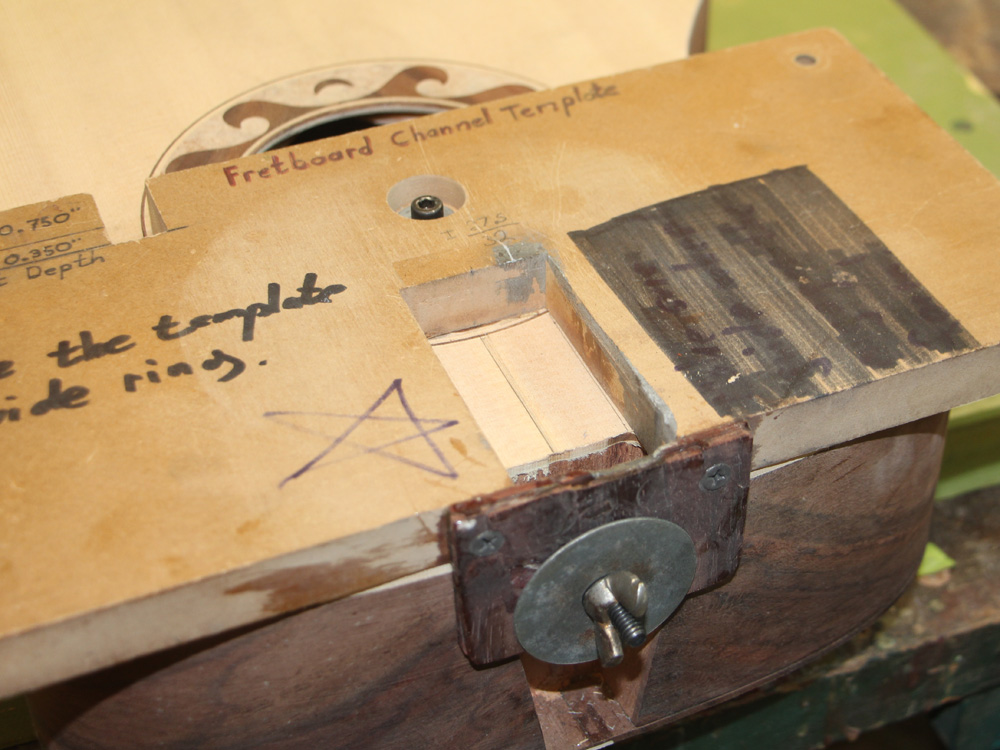
To create the Cantilevered Fretboard Support Channel I use this template...
 ( 182 ) 12-Mar-2015
... and the template fixture on my router.
 ( 183 ) 12-Mar-2015
 ( 184 ) 12-Mar-2015
 ( 185 ) 12-Mar-2015
And here are all of the body side features of the neck attachment system.
 ( 186 ) 12-Mar-2015
One last detail is to reinforce the underside of the hidy-wing with a small fillet. The hidy-wing shields the space between the neck and the body from view.
 ( 187 ) 12-Mar-2015
 ( 188 ) 12-Mar-2015
 ( 189 ) 12-Mar-2015
 ( 190 ) 12-Mar-2015
 ( 191 ) 12-Mar-2015
 ( 192 ) 12-Mar-2015
 ( 193 ) 12-Mar-2015
 ( 194 ) 12-Mar-2015
Looking like a guitar.